Single Page Development with jQuery, Require, Backbone and Jasmine
Published: July 18, 2012, 9:56 a.m. #webdev #spa #backbonejs
In this part we will focus on creating simple application with jQuery and Backbone. Shortly I will mention how to setup LightTPD server on windows to have a server for our simple Single Page Application. The application will display a library of books. A book will be described by it's title and author. Library will allow to edit, delete and add books.
Introduction
jQuery is cool. But when you start develop larger single page application just using jQuery you can easily end up with huge spagetti code with piles of jQuery selectors and callbacks tying your data to the DOM. As you might noticed, this isn't the best way to do the job.
Using Backbone.js allowes you to start getting your scripts towards MVC. But Backbone won't do all the stuff for you. It gives you the posibility to layout your main framework for your application by providing necessary tools for doing so.
Documentation for Backbone and Underscore
I strongly suggest to use this documentation for Underscore and Backbone
Setting up simple project using jQuery + Backbone.js
One of the best examples of simple Backbone application is Todos by Jérôme Gravel-Niquet. The code is well documented and live example can be found here. Update 2019: This app has already been rewritten: here. But today we will write our own app.
We will write a sipmle Library application which allows us to manage books. Books won't be stored to database, but will be loaded from static JSON file. We won't save our collection of books. We want to add, remove, edit books. We need to setup simple static file server and we will create 3 files:
- index.html - containing basic layout, 3 templates, loading all libraries and starts the app
- app.js - our backbone Library application
- books.json - static json data of our default books
You can checkout the working code at http://jsfiddle.net/pavel_krupala/xEcm7/5/. But the loading of our json will fail, because jsfiddle doesn't allow to store such things :), but the app is working you can add, remove and change your items as you want.
Here are the three files to download:
index.html
We will start with the index page. Create a new file and write down this code:
<html>
<head>
  <script type="text/javascript" src="http://code.jquery.com/jquery-1.8.0.min.js"></script>
  <script type="text/javascript" src="http://underscorejs.org/underscore-min.js"></script>
  <script type="text/javascript" src="http://backbonejs.org/backbone-min.js"></script>
  <script type="text/javascript" src="app.js"></script>
  <style type="text/css">
    body { font-family: Georgia, Arial, sans; }
  </style>
</head>
<body>
  <div id="app"></div>
</body>
</html>
This is the most simple layout you will ever start with. Basicly we link our libraries and then our application in app.js script.
Starting Lighttpd static server
I'll shortly describe how to setup Lighttpd server on Windows 7. If you are using Tux or anything else, use google and I believe you won't have any troubles.
Visit WLMP Project site for getting latest build of Lighttpd on Windows and install it in some directory. Mine will be D:\LightTPD
You can start your server right ahead :). If your :80 port is already taken, checkout if you are using Skype. Turn it off, start lighttpd, turn on skype and Skype will use another port instead of 80 (Dunno why they try to use port 80, but nevermind).
I like to configure my local sites as virtualhosts so do the following:
- Open your notepad as Administrator (RMB run as Adminstrator)
- Click Open file and choose C:/Windows/System32/drivers/etc/hosts
- Add a new line:
127.0.0.1 local.static - Open D:/LightTPD/conf/lighttpd.conf and at the end of file add line: include "local.static.conf"
- Create new file D:/LightTPD/conf/local.static.conf and put in this content:
$HTTP["host"] =~ "(^|\.)local\.static$" { # here is path to your folder with files server.document-root = "D:\\www\\local.static" } - Start your server with D:/LightTPD/LightTPD.exe
When you type http://local.static/ you should see something like this:
Now you can put your files into D:/www/local.static/ (I will call it document root from now on)and they will be shown in your browser without any problems :). If you run into any troubles, try this link: http://redmine.lighttpd.net/projects/1/wiki/TutorialConfiguration
Now you can put your index.html into your document root and we will add some other files soon...
books.json
[
 { "title": "The Beetle who went on his Travels", "author": "Hans Christian Andersen" },
 { "title": "The Emperor's New Clothes", "author": "Hans Christian Andersen" },
 { "title": "The Snow Queen", "author": "Hans Christian Andersen" },
 { "title": "Alice's Adventures in Wonderland", "author": "Lewis Carroll" },
 { "title": "Pinocchio", "author": "Carlo Collodi" }
]
This is just a simple static file with json data. Put it in your document root.
app.js
This file will be longer so lets start with the basic stuff first.
Our script will be in $(function() { .... }); because we want to run it after DOM of our page is loaded.
Open your app.js file in your document root and add these lines:
$(function(){
    // Book Model
    var Book = Backbone.Model.extend({
        defaults: function() {
            return {
                title: "enter title",
                author: "enter author"
            };
        },

        clear: function() {
            this.destroy();
        }

    });

    // BooksCollection
    var BooksCollection = Backbone.Collection.extend({
        model: Book,
        url: "/books.json"
    });

    // instantiate BooksCollection
    var Library = new BooksCollection;

});
Now we created a simple model called Book. A set of models is in Backbone called Collection. Our collection of Books is called BooksCollection. An instance of BooksCollection will be stored in variable Library. When you add a simple console.log(Library) after instantiating in your app.js file you can see in your console this:
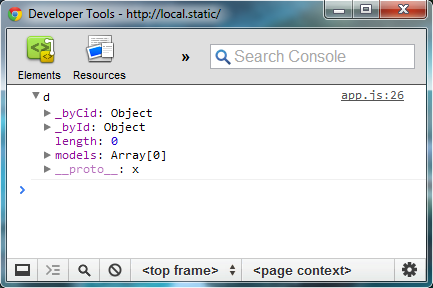
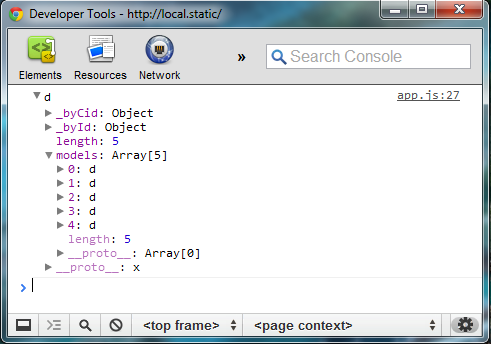
So it is an empty collection now. By calling Library.fetch() our script will fetch 5 books from our static file books.json. After writing it out with console.log you will see, that our collection is now filled with 5 models:
Ok, so models and collection are working. Before moving to the views remove any other lines which are not in the listing of app.js above.
App.js - Application View
For our application to run I usually use a backbone Controller (it's an instance of Backbone.Router class), but not this time. Our main view wont change so we will create a View and instantiate it right after it's definition. Events in this view will handle rest. Add this code to your app.js script:
var AppView = Backbone.View.extend({
  el: $("#app"),
  template: _.template($("#library-template").html()),

  initialize: function() {

    _.bindAll(this, 'render');

    this.render();

    Library.fetch();
  },

  render: function() {
    this.$el.html( this.template() );
  }
});

var App = new AppView;
As you can see we refer to a template which is loaded from DOM element with id library-template. But we haven't defined it yet. Let's do it now. Add these lines to your index.html, right befory your closing </body> tag will be a good spot:
  <script type="text/template" id="library-template">
    <h1>Library</h1>
    <ul id="books-list"></ul>
    <div id="new-book"></div>
    <a href="javascript:void(0);" id="add-book">[Add Book]</a>
  </script>
When you refresh your browser you shold see this, without any errors in console:
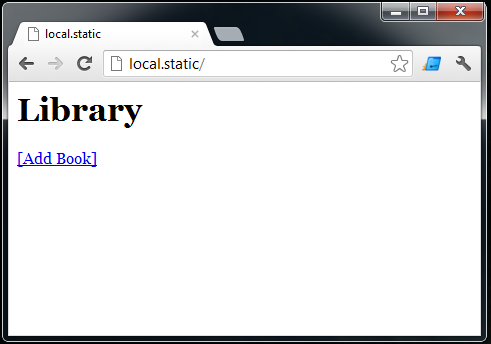
Yeah! Our first template and it's working! Awesome!
We just created a view which renders out a template and loads our collection with data.
Using Collections in Backbone
If you look closer into collection documentation, you will see that collection can fire events "add", "remove" and "change". We will use them in our favor. If you dig deeper into fetch function, you will find that collection resets when got some models from server. Event "reset" will be usefull too.
Change your initialize function like this:
    initialize: function() {
        // bind addOne, addAll and render functions to this object
        _.bindAll(this, 'render', 'addOne', 'addAll');

        this.render();

        Library.bind('add', this.addOne, this);
        Library.bind('reset', this.addAll, this);

        Library.fetch();
    }
This way we can register "reset" and "add" event of our collection in our view to call functions addAll and addOne. Let's add them in our view now
    addAll: function(collection) {
        collection.each(this.addOne);
    },

    addOne: function(book) {
        console.log("addOne", book);
    }
When you run the script now you will see message "addOne >d" 5 times in your console. What happened was that collection fetched successfully from your server (in our case the response was content of books.json file). This triggered "reset" event. Reset event called our addAll registered callback. AddAll function for-eached the collection and for every single model there fired addOne function. addOne writes out the console stuff, but later on, addOne will instantiate a View for our Book model (BookView) and render it out to DOM. To be more precize in our list. In initialize function we registered event "add" too which is not used right now, but later, when we add a new Book model, we want to do the same thing - instantiate a view and render the book out.
View for Model Book - BookView
This time our view will little differ, write down this code in your app.js:
    var BookView = Backbone.View.extend({
        // we will create new element, so use tagName
        tagName: "li",

        // our template for book view
        template: _.template($("#book-template").html()),

        initialize: function() {
            // something to do on startup?
        },

        render: function() {
            this.$el.html( this.template({ model: this.model }) );
            return this;
        }
    });
First of we don't have the DOM elemnent when rendering so instead of using el parameter we define tagName parameter. This will set the view's element (Every view is bound to an element) wi be LI tag. Again, we will use a template. Render function now renders the template with aditional parameter (I call it template context) saying, that "model" in our template will be a model from our view.
We will pass our model into the view when instancing:
var view = new BookView({ model: my_book });
So let's update our AppView addOne function like this
    addOne: function(book) {
        var view = new BookView({model: book});
        this.$("ul#books-list").append( view.render().el );
    },
And finally add the template to your index.html file:
 <script type="text/template" id="book-template">
   <strong><%= model.get("author") %></strong> - <%= model.get("title") %>
 </script>
When you refresh your browser you should see:
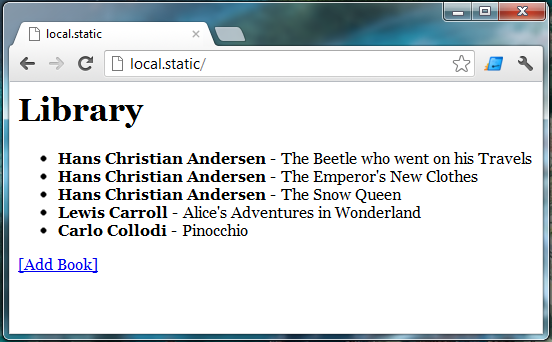
Yeeah! Finaly we can see some results of our work! :)
Now we add some controls to each element, modify our template for book:
  <strong><%= model.get("author") %></strong> - <%= model.get("title") %>
  <span class="controls">
    <a href="javascript:void(0);" item-action="edit">[Edit]</a>
    <a href="javascript:void(0);" item-action="delete">[Delete]</a>
  </span>
And make it visible only on hover, by adding css:
    ul#books-list li span.controls {
        display: none;
    }

    ul#books-list li:hover span.controls {
        display: inline;
    }
Now when you hover over a book you will see two link for Edit and Delete.
Removing a model from collection
One thing you should be aware of when working with JavaScript is releasing your memory. When an user clicks [Remove] action of our collection we have to free the model.
Add a new function and event to our BookView:
    var BookView = Backbone.View.extend({
        // ...
        events: {
            "click a[item-action=delete]": "clear"
        },

        // ...

        clear: function() {
            this.$el.remove();
            this.model.clear();
        }

        // ...
    });
In the clear function we call the model's clear function (defined above in our model). It just calls model.destroy(). If you test it in your browser your items will disapper after clicking on [Delete] action.
One thing I love about Backbone is that when we split the list logic and item logic the way we did, you can see each events are covered/propagated/handled on each level :). Imagaine in jQuery if you try to code this in for loops. I would rather kill myself than do it that way :P.
Forms
Now we will do the Edit and Add action of our application. Let's create a template first in our index.html. Our template will have a book model passed in the context, so we will use it:
<script type="text/template" id="book-form">
    <label>Author</label>
    <input type="text" name="author" value=""/>
    <label>Title</label>
    <input type="text" name="title" value=""/>
    <a href="javascript:void(0);" id="submit">[Submit]</a>
</script>
Add Book Action
This process will be simple. When clicking on [Add Book] link (we need to register an event), we will call a function (event registers to function - callback), which renders the template (create new template variable) and renders it in the DOM. Here are the new lines in AppView object:
    template_form: _.template($("#book-form").html()),

    events: {
        "click a#add-book": "onAddBook"
    },

    onAddBook: function() {
        var container = this.$("#new-book") || $('<div id="new-book"> </div>');
        container.html( this.template_form({ model: new Book }) );
        this.$el.append(container);
    }
When you try this code on your browser you should see (after clicking on Add Book) a line with two input fields.
We are creating a container (if it does not exist already) and fill it with our form template.
Now we can edit values in the fields and click submit... So let's create another event and callback:
    events: {
        // ...
        "click #new-book a#submit": "onAddBookSubmit"
    },

    // ...

    onAddBookSubmit: function() {
        var val_author = this.$("#new-book input[name=author]").val();
        var val_title = this.$("#new-book input[name=title]").val();
        Library.create({
            title: val_title,
            author: val_author
        });
        this.$("#new-book").empty();
    },
Awesome! Now we can add a new book to our library. Last remaining is modify of existing book...
Modify existing Book
This will be simple too, we already did this a few times: When user clicks (event) a [Edit] link (element) we run a view's function edit (callback). Add these lines to your BookView:
    var BookView = Backbone.View.extend({
        // ...

        events: {
            // ...
            "click a[item-action=edit]": "edit"
        },

        template_form: _.template($("#book-form").html()),

        edit: function() {
            // add a class to the element to enable easy styling with css
            this.$el.addClass("edit");
            // render form template
            this.$el.html(this.template_form({model:this.model}));
        }

        // ...
    });
Whoaa! When we click the [Edit] link, our text changes to input boxes! :). Now the submit action, again in BookView object:
    events: {
        // ...
        "click a#submit": "onSubmit"
    },


    onSubmit: function() {
        var val_title = this.$("input[name=title]").val();
        var val_author = this.$("input[name=author]").val();
        this.model.set({
            title: val_title,
            author: val_author
        });

	// maybe the user didn't changed the values!
        if (! this.model.hasChanged() )
            this.render();
    }
Nice work! Our application is ready and running, here are the source codes for download:
Summary
This tutorial is pretty log, but we've managed to do a lot of stuff. We have learned how to:
- setup LightTPD on Windows
- create models in Backbone
- create collections in Backbone
- create views in Backbone
- register events and callbacks through Collection and DOM elements
- create, load and render templates with Underscore
I hope you enjoyed this tutorial. If you have any questions don't hessitate to ask in the comments below, I'll be glad to answer them and we will see at the next part, where we will split our source code into different files using Require.js.
